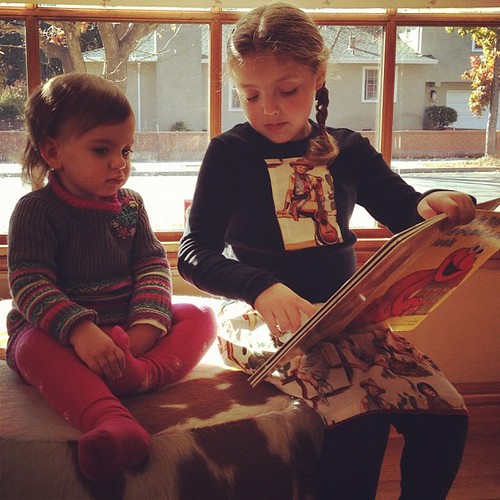
Making a skirt for a little girl is tempting because it requires very little fabric, and this guest post from my friend Cori describes how to do it in very few steps. But what I really want to do is make one for myself. Tonight, dear sewing machine, I pledge to spend a little bit of time with you. Thanks, Cori for the inspiration!
How to sew the easiest ever skirt
Recently I was given a sewing machine and my long-forgotten teenage love of sewing was rekindled. I started by re-purposing old clothes – shirts to dresses, tanks to totes and tops to skirts. Eventually my daughter and I found our way to the remnant bin and bought some scraps to make doll clothes and purses. I posted the creations online and my friends were soon coming forward with offers of fabric donations which I scooped up gratefully. My first project was a skirt for my daughter and we received so many compliments that I made her another. And another. These skirts are SO easy, and because your only “unfinished” seam is the selvage, it looks tidy and won’t unravel.
Four-Seam Skirt
You will need:
- A light weight cotton (not knit) fabric from a 42 inch bolt. Decide how much fabric you need by deciding how long you’d like it to be and then add four inches to that number. (for example, If I want the skirt to be 14 inches from the top of the waist band to the hem – the perfect size for my 6-year-old – then the number I get is 18 inches.
- A length of 1-inch wide elastic for the waist band
- A safety pin or elastic feeder to get the elastic into the waistband you’ll be creating
- Rickrack or ribbon (optional)

Instructions:
1. Lay out your pre-washed and ironed fabric right side up so the selvages are on the left and right and fold it in half (right sides together).

2. SEAM ONE: Stitch up the side.

3. Create a waist band by ironing a quarter inch under and a tad more than an inch from top to create a casing for the elastic. Iron and pin in place.
4. SEAM TWO: sew a seam as close the top of the waist band as possible (sew all the way around)

5. SEAM THREE: sew a seam as close to the bottom of the waist band as possible (leave two inches open to insert elastic)

6. Adjust length of skirt and cut if necessary.
7. SEAM FOUR: hem

8. SEAM FIVE is completely optional: pin rickrack or ribbon on the bottom and sew in place.

9. Now you have a tube with a finished hem and a nearly finished waistband. You remembered to leave a few inches of the bottom seam in the waistband open, right? Thread the elastic through the casing and and sew together. Sew casing shut.


What’s that hanging off my elastic? It’s my cool elastic threader tool. (Editor’s note: I couldn’t find Cori’s on Amazon, but here are similar products.)

Thanks, Cori, for contributing to our Makin It series! Not a skirt person or a sewer? Pick a different project!
Check out Cori’s daughter in her wardrobe of mom-made skirts, many of which have coordinating shirts.
Matching with Mommy!!
- 5 Mistakes I Made When Booking My Disney VIP Tour (So You Don’t Have To) - June 9, 2024
- 15 Super Fun 100 Day Project Ideas for Kindergarten - January 11, 2024
- Best Baby Tracking App of 2023 [The Feeding & Diaper Trackers You Need] - August 2, 2023


